5. Creating a Data View
The platform offers several methods of generating a new data view from a dataset.
You can create a new data view by placing your mouse over the Data Views button from the main menu and clicking on New. This action will launch an internal lightbox from where you can choose the dataset you want to use to generate the new data view.
Additionally, you may generate a new data view directly from any dataset. You can place your mouse over the dataset you want to use, then from the Datasets menu select Create Data View and follow the prompts. Or you can also click on the dataset’s title to go into the Datasets page, and then on the Create Data View button on the upper right side on your screen.
Once you have followed the process correctly, the platform will launch the wizard to create a data view. Select the table you want to use to create the data view.
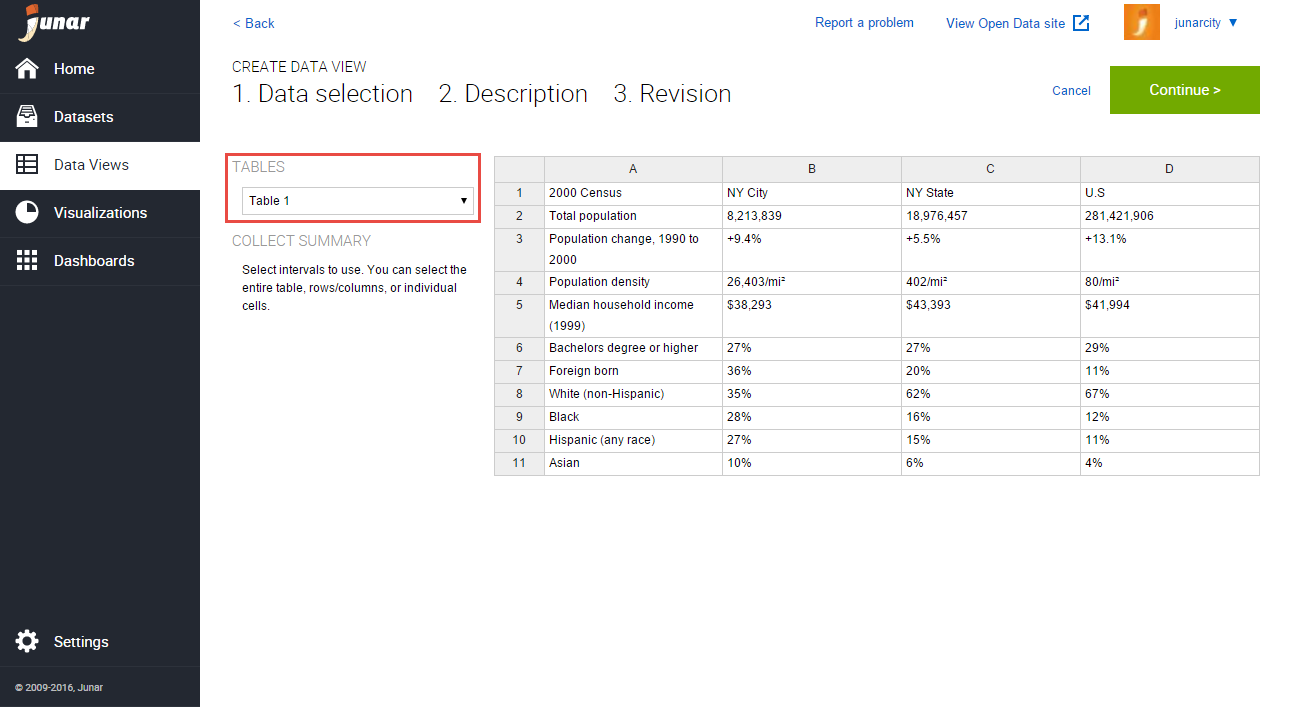
You can select all the rows and columns by clicking on the upper left section of the table. Or select specific data by clicking on each individual column and row.
After selecting the data, you can use the Advanced Mode to set your headers, add filters to the data, and add aliases.
Setting the Data View’s Headers: Click on the Select table headers option from the Advanced Mode section, then select the row that you want to set as the data view’s header, then press Done.
Adding Filters: Click on Filter Data for selecting the column to apply a filter to. From the drop-down, select the column and add one of the following operations:
- Equal to: Enter a value that is exactly what appears in the selected column.
- Not Equal to: Enter a value that is not exactly to what appears in the selected column.
- Higher than & Lower than: Enter numeric values, allowing return values to be higher or lower than your inquiry.
- It contains: Enter a value that is similar to what appears in the column.
And then select one of the following operations:
- Parameter: Enter any parameters you want to add to the web service.
- Fixed Value: Enter a specific parameter for the query.
Add Aliases: This function is of most interest to developers. Its aim is to enable users to add aliases to the columns, allowing them to more easily identify the columns when processing through an API. Select the Alias option, then on each column in the text boxes, enter the desired alias name and click Done.
Once you are done making changes to your new data view, click on Continue to add a Title, Description, and Other Metadata. When finished, click on Continue for a final review. If you are happy with the result, click on Save. The new data view will be saved as a Draft, and you can now publish it to the Open Data microsite or create a visualization.
5.1 Editing and Deleting Data Views
To edit/delete a dataset, please go to the Data View page by clicking on the Data View button from the main menu on the left. Place your mouse over the data view’s title in the list and the editing menu will be displayed. Click on Edit or Delete.
- Create Visualization: When selecting this option, the user is able to create a new visualization using the selected data view as the source.
- Edit: When selecting this option, the user is able to update the data view’s information.
- Delete: When selecting this option, the user is able to delete the recent changes or all changes made to the data view.
- View Dataset: When selecting this option, the user accesses the original dataset.
You may also click on the data view’s title to go into its information section, then click on the options menu ![]() located on the upper right part of your screen. From the drop down menu, click on Edit or Delete.
located on the upper right part of your screen. From the drop down menu, click on Edit or Delete.
5.2 Publishing a Data View
To publish a data view, the associated dataset must be published. By default, all new data views will be saved as drafts. If the data view is under review, it must first be accepted to be published. To publish a data view to the Open Data microsite, click on the data view of interest and then the Publish button in the upper right section.